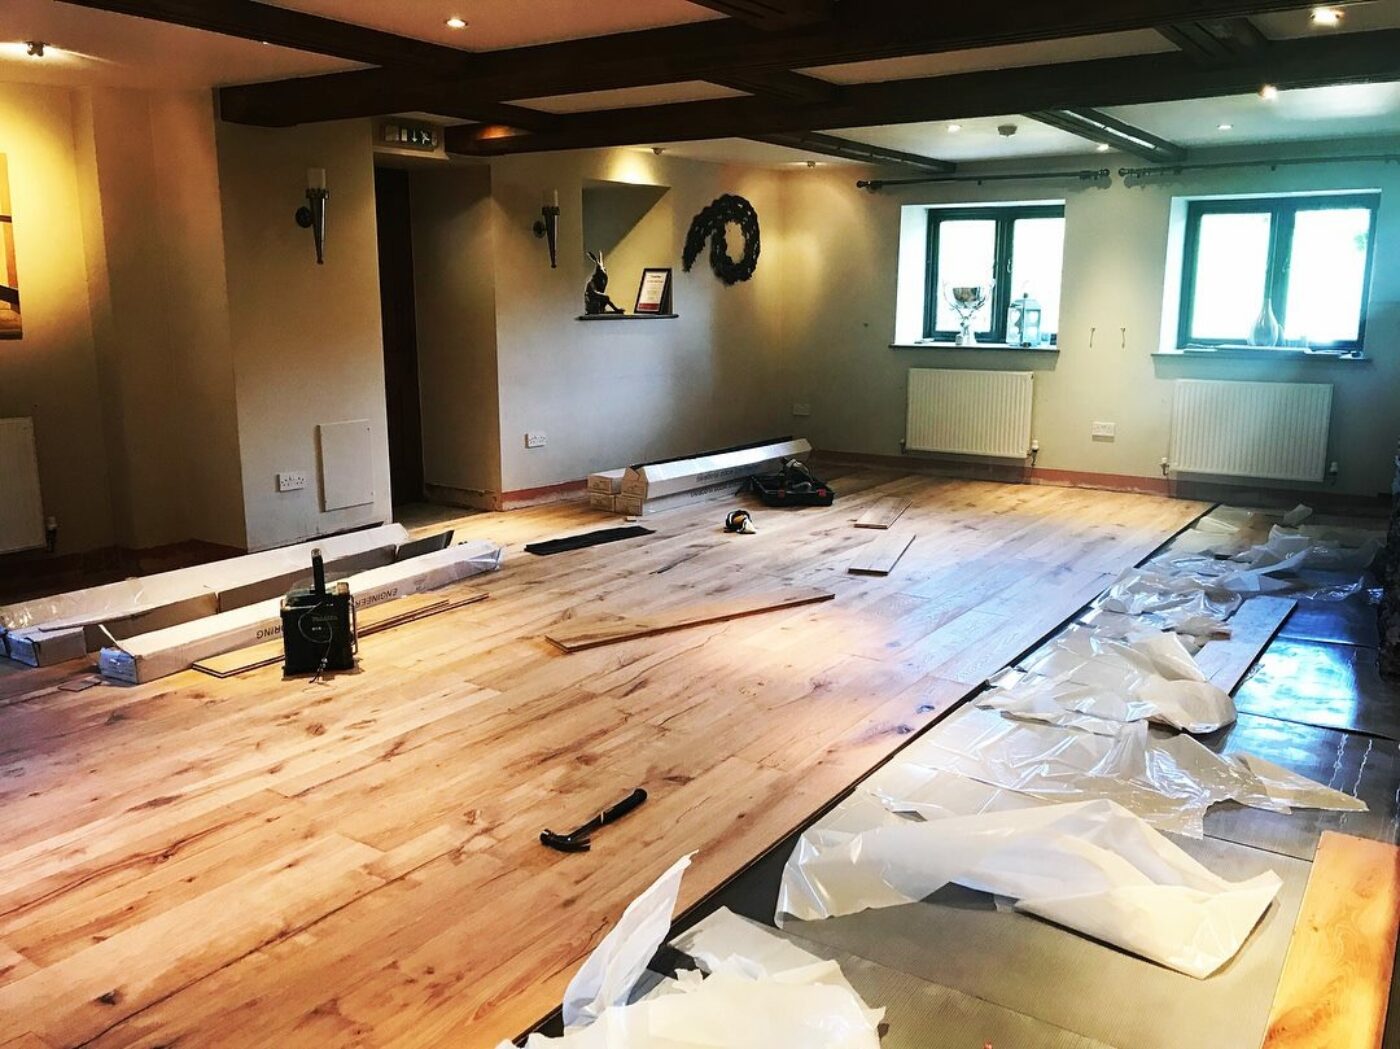
FITTING YOUR WOODEN FLOOR
It is important that you choose, fit and finish your flooring in a way that will give you a practical, problem free and beautiful floor that is going to last you a lifetime. In this article we discuss different methods and factors to consider when fitting engineered wood or solid wood flooring.
There a number of different methods which can be used to lay our flooring and every project is a little different, this makes it hard for us to cover every aspect of fitting a wooden floor. However, it’s in our ethos to try and be as helpful as possible so we have briefly detailed below some of the most common and recognised methods. Please do remember that we are a long established, friendly, family business that is always happy to help and advise. If you would prefer, just pick up the phone and give us a call!
EXPANSION GAP
It is recommended that when fitting engineered wood flooring, an expansion gap is left around the perimeter of the room. This is the case with both solid and engineered wooden floor boards. Most of the time the expansion gap will be hidden beneath a skirting board or beading so it is recommended that a 15mm expansion is left. There are some circumstances where it would be preferable to have less of a gap than 15mm, but we recommended consulting with us first. It is recommended that when the boards are spanning a width of over 7.5 mtrs additional expansion is provided. In some cases this may not be necessary so please consult with us beforehand.
SECRET NAILING & SECRET SCREWING
Secret nailing your flooring can often be the most straight forward method of fitting engineered wood flooring when laying onto a wood sub floor, battens or joists. For those of you who are unfamiliar with the term ‘secret nailing’ it is when a serrated nail is driven on a 45 degree angle through the tongue of the board using a flooring nailer (commonly known as a Porta-Nailer). Not only will this securely hold the boards tight up against one another and in place, it will also not be visible once the job is complete. When your new flooring is to be laid onto a wooden sub-floor, such as structural plywood, it’s your choice as to which direction you feel the boards are going to look the best running. However, when you new flooring is to be laid onto existing wooden floorboards it is good working practise to run your new boards in the opposite direction to the existing floor. Secretly nailing is also a very effective method of installation if your boards are to be laid directly over floor joists. If you purchase a flooring that’s strong enough span joists (a structural flooring), the boards can quite simply be nailed down to each joist providing: The joists are no more than 400mm centres, each board must span at least 2 joists, end joints can fall between joists but you must not have 2 joints beside one another, end T&G joints should be glued.
Secret screwing a flooring down shares all the factors mentioned above. The difference is that, rather than serrated nails and flooring nailer, screws are manually screwed down through the tongue. A special type of screw should be used so that the head of the screw is lost within the tongue of the board thus allowing the groove to still slot freely over the tongue. Tongue-Tite are a well known brand of these screws but alternative brands are also available. Screwing is slower than nailing however the advantage you have with screwing is that boards can be removed more easily. This can make it a popular method for DIYers or for floors that may need to come up to gain access underneath.
GLUE DOWN
Despite not being the quickest, the use of flexible adhesives to glue wood flooring down is still a popular method of installation. This can be used when laying onto a plywood sub floor, concrete screed or in some circumstances chipboard. A floor that has been glued can feel as solid as any other, as well as react more favourably to movement thanks to the flexibility of the adhesives. The adhesives or bonding agents that can be used to glue wooden floors down usually come with a guide as to how to use the product so do read any instructions that are provided. The most popular method of gluing a wooden flooring down is by using a trowel out adhesive however this can be a messy and and it’s important that care is taken when using these products. If you’re looking to glue your flooring down and would rather a cleaner choice then gun applied ‘sausages’ of adhesive can be favourable – such as Rewmar MS650.
Nowadays many are choosing underlays rather than adhesives as they can be quicker to use, equally as effective (assuming the correct underlay is used), cleaner to use and, many consider, more pleasant to work with. More information on this can be read below. There are however circumstances where adhesives are the most appropriate method of fitting and would be recommend over floating a floor with underlay. This is something that should be discussed with us prior to your purchase.
FLOATING
Floating your floor by using an underlay is considered one the easiest methods of fitting engineered wood flooring. There are many underlays available but from experience we have found Elastilon to be one of the best on the market. The best way to see for yourself how Elastilon works is to watch the Elastilon Demonstration Video. This can be found on our Elastilon web page. As you will see from this video, Elastilon is a very simple and very effective product that can save a huge amount of time. There are 2 types of Elastilon, Basic & Strong, and it’s the strong that is designed for underfloor heating. It is important that with any underlay you stagger the end joints of your floor. Due to the tension within the plywood an engineered oak board can bow along it’s length and if you use only full length boards (for example across a hallway) large sections of the flooring can bow and ‘bounce’ underfoot.
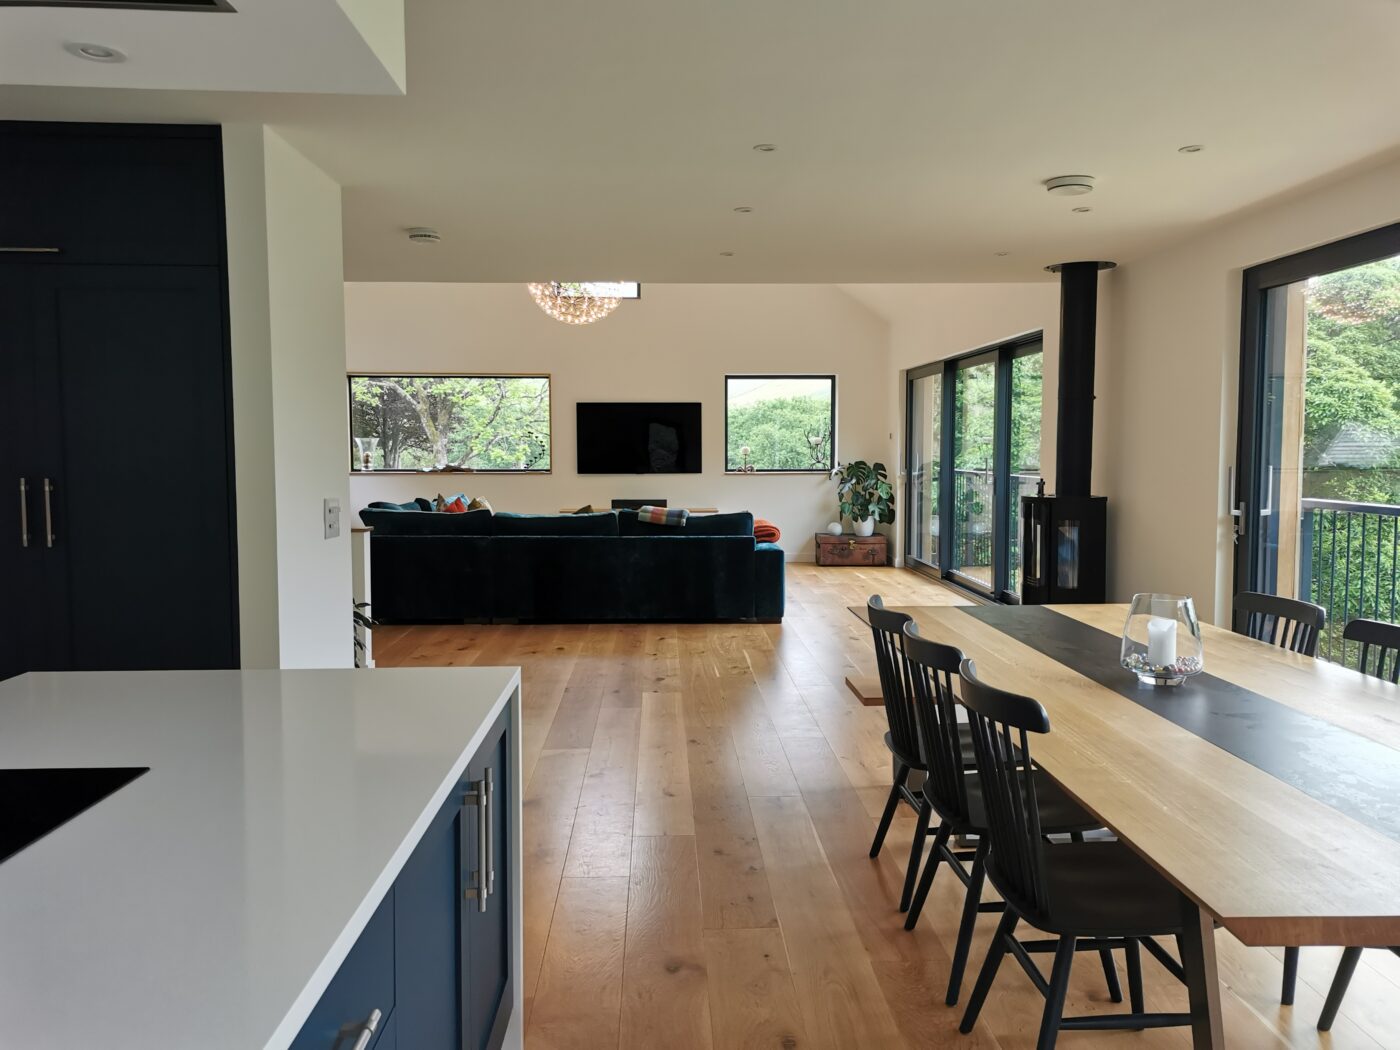
FINISHING YOUR WOODEN FLOOR
Some of our engineered wood floors come pre-finished with no need to treat on site. If you purchase a pre-oiled board it is up to you as to whether you wish to apply an additional coat of oil once the board is laid as the final touch. This is considered good working practice, particularly in high traffic or stressful areas. Always speak to us first as to which finish is compatible with the board you have purchased. Many of our pre-oiled board are treated with Woca hardwax oil which makes them compatible with many of the Woca oils and maintenance products. Again, this would be something we would discuss with you at the time of order, to allow you to get the best finish for your wooden floor.
Purchasing an untreated board with no finish is a popular choice as it gives you complete control over the colour. It also means that you can treat your floor using a high quality finish that’s durable, water / stain resistant as well as being easy to clean and maintain. We have found Treatex hardwax oil to be a very popular choice of finish for its quality, value for money and easy application. Treatex Hardwax Oil not only enhances the appearance of your floor but also thoroughly protects it from stains, accidents and general wear and tear. This product is also suitable for the treatment of any internal wood surfaces such as doors, worktops, furniture etc meaning that you can tie in other wood features in your property with your floor.
More information on Treatex Hardwax Oil can be found here.