how to measure your floor
The Basics
Planning a new floor starts with accurately measuring the area to determine how much flooring material you need. This is a straightforward process requiring just a tape measure, a pen and paper for recording measurements, and a calculator if needed.
Follow these steps to measure your floor correctly:
Measure the width and length of the room. Be sure to include bay windows, doorways, and recesses.
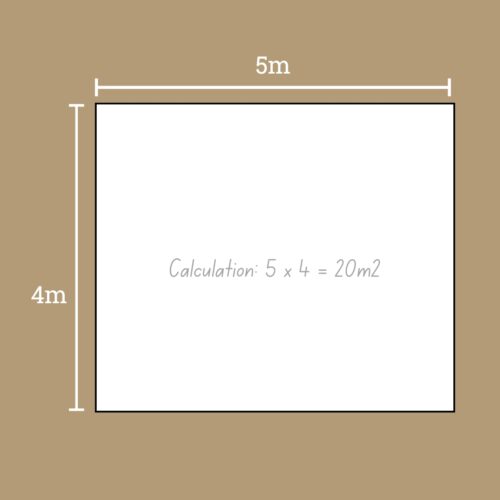
Calculate the total area by multiplying width x length.
Example Calculation:
Length = 5m, Width = 3m
Total area = 5m x 3m = 15m²
Measuring Irregular Shaped Rooms
If your room is not square, split the area up into smaller measurable rectangles.
In this example we have split the areas into 2 (labelled area A and area B).
Using the same calculations as above, work out the m2 of each area and add them together to calculated the overall m2 for the room.
Example Calculation:
Area A: 5m x 4m = 20 m2
Area B: 4m x 3m = 12 m2
Overall area: 20 m2 + 12 m2 = 32 m2.

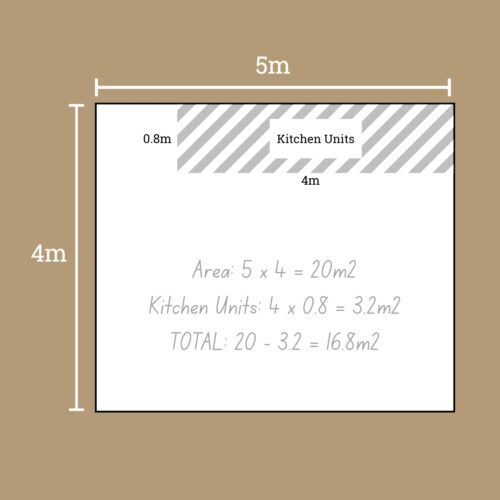
How to deduct areas
If there are areas of your floor you do not intend to lay your new flooring, it’s simpler to work out the overall area, then deduct the area where the flooring is not required.
You can do this by using exactly the same principle as above – splitting the areas into measurable rectangles. In this example:
Calculate the overall floor area: 5 x 4 = 20 m2.
Calculate the area for kitchen units: 4 x 0.8 = 3.2 m2
Deduct the kitchen unit area from the overall area: 20 – 3.2 = 16.8 m2
Allowing to Wastage
When measuring for new flooring, it’s essential to account for waste, as some cuts and end pieces may be unusable. The recommended wastage allowance is:
5-10% for standard flooring installations.
10-15% for herringbone or more complex flooring patterns.
Tips when measuring your floor
- Utilise our free website Flooring Calculator which, once the measurements are entered in, will work out the m2 you require.
- Clear the floor to allow an unobstructed measurement.
- Take 2 to 3 measurements for both length and width, as walls (especially in older properties) may not be perfectly straight.
- For irregularly shaped rooms, break the area into smaller sections (e.g., an L-shaped room can be split into a rectangle and a square, then added together).
- Measure any door clearances – measuring the gap between the bottom of the door and floor level. Will your new floor fit comfortably under the door or will the door require shortening?
Checking your subfloor
A well-prepared subfloor ensures your new flooring performs at its best. Before installation, inspect your subfloor for potential issues. Key considerations include:
- Identifying the subfloor type (concrete, chipboard, or floorboards) and its compatibility with the new flooring.
- Checking for any necessary repairs or adjustments, such as crack repairs, self-levelling screed, or ply boarding.
- Assessing moisture or damp issues using hygrometers or moisture detectors. Professional flooring installers can provide assistance if needed.
By following these steps, you’ll have a clear understanding of how to measure your floor accurately, taking the first step toward selecting your new flooring. If you require further assistance, feel free to contact us via email at info@jfjwoodflooring.co.uk or call us on 01598 740197